



열무김치 | Young Radish Kimchi | K-Food Recipes
K-FOOD Recipe Information
- English Title
- Young Radish Kimchi
- Korean Title
- 열무김치
- Cuisine
- Korean
- Category
- Kimchi / Fermented Side Dish
- Servings
- 4 servings
- Main Ingredients
- young radish greens (yeolmu), radish, kimchi seasoning paste, salted brine
- Cooking Method
- Salt-curing, mixing, and short fermentation
- Flavor
- Fresh, crisp, lightly pungent, savory, and refreshing with a clean spicy finish
- Difficulty
- Medium
Yeolmu kimchi is a seasonal Korean kimchi made with young radish greens and often a little radish, seasoned with a light chili paste and fermented in a thin brine. Compared with napa cabbage kimchi, it is usually softer in body, more refreshing, and best when the greens stay crisp and the broth is clean and savory. The key is careful salting, gentle washing, and balanced seasoning so the kimchi ferments quickly without becoming watery or dull.
English Ingredients & Instructions
Ingredients
- 1 bunch young radish greens (yeolmu), about 800 g to 1 kg
- 200 to 300 g Korean radish, cut into thin matchsticks or small batons
- 1 to 2 small cucumbers, optional, lightly salted
- 1/2 cup coarse sea salt for salting the greens, plus extra as needed
- 4 cups water for dissolving salt if needed
- 3 to 4 scallions, cut into 4 to 5 cm lengths
- 1/2 onion, thinly sliced, optional
- 2 to 3 green chilies, sliced, optional
- 1 small red chili, sliced, optional
- 3 tbsp Korean chili powder (gochugaru), adjust to taste
- 2 tbsp minced garlic
- 1 tsp minced ginger
- 1 to 2 tbsp salted anchovy sauce or sand lance sauce, to taste
- 1 to 1 1/2 tbsp fish sauce, optional if needed for depth
- 1 to 1 1/2 tbsp sugar or plum extract, optional, for balance
- 3 tbsp flour or rice flour
- 2 1/2 to 3 cups water for the porridge
- 1 to 1 1/2 tbsp salt for the brine, adjusted to taste
- 2 to 3 cups cold water or cooled porridge liquid, as needed for the kimchi broth
Instructions
- Trim the roots of the young radish greens, remove any tough or damaged leaves, and cut into bite-size lengths. Rinse gently 2 to 3 times to remove dirt without bruising the leaves.
- If using radish, cut it into thin batons or small matchsticks. Lightly salt the radish pieces separately for 20 to 30 minutes if they are thick, then drain.
- Salt the yeolmu evenly with coarse sea salt, turning it once or twice so it wilts uniformly. Let it sit until the stems bend easily but are still crisp, usually about 1 to 2 hours depending on thickness.
- Rinse the salted greens 2 to 3 times in cold water to remove excess salt. Drain well in a colander for at least 20 minutes.
- Make the porridge by whisking flour into water, cooking over medium heat until lightly thickened, then cooling completely. This helps the seasoning cling and forms a cleaner kimchi broth.
- In a large bowl, combine gochugaru, garlic, ginger, anchovy sauce, fish sauce if using, and sugar or plum extract if using. Add the cooled porridge and enough cold water to make a loose seasoning mixture.
- Add the drained yeolmu, radish, scallions, and optional onion and chilies. Gently toss by hand until evenly coated without breaking the greens.
- Pack the kimchi firmly into a clean container, pressing out air pockets. Pour in enough seasoned broth to cover the vegetables but leave a little headspace for fermentation.
- Leave at cool room temperature for several hours to 1 day, depending on ambient temperature, until the kimchi begins to smell pleasantly tangy and the broth shows light bubbling. Then refrigerate.
- Chill for at least several hours before serving. Yeolmu kimchi is often best when lightly fermented and still crisp, but it can continue to develop deeper flavor in the refrigerator.
SEO Keywords: 열무김치, young radish kimchi, yeolmu kimchi recipe, Korean summer kimchi, yeolmu water kimchi, seasonal kimchi, homemade kimchi
열무김치 만드는 법
열무김치는 어린 열무의 시원한 풋맛과 아삭한 식감을 살린 여름철 대표 김치입니다. 배추김치처럼 오래 숙성시키기보다, 적당히 절여 숨을 죽인 뒤 맑고 가벼운 양념국물에 담가 짧게 익혀 먹는 것이 특징입니다. 핵심은 열무를 무르지 않게 절이고, 양념은 과하지 않게 맞추어 재료의 청량한 맛을 살리는 데 있습니다.
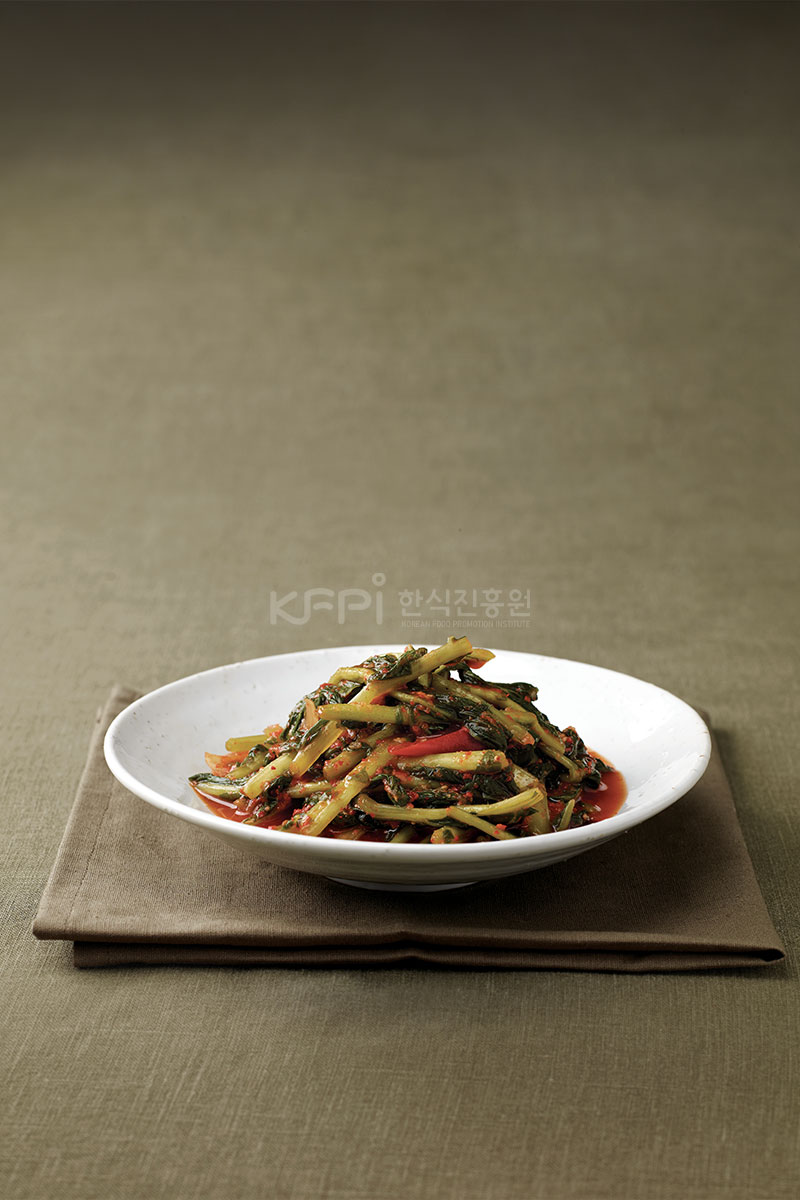
1. 재료 및 분량
재료 열무 1단(약 800g~1kg)
재료 무 200~300g(선택, 채 썰기)
재료 오이 1~2개(선택, 굵으면 반달 또는 길게 썰어 약간 절이기)
재료 천일염 1/2컵 내외(열무 절임용)
재료 물 4컵 내외(소금물용이 필요할 때)
재료 실파 3~4대(5cm 길이)
재료 양파 1/2개(선택, 채 썰기)
재료 풋고추 2~3개(선택, 어슷 썰기)
재료 홍고추 1개(선택, 어슷 썰기)
재료 고춧가루 3큰술
재료 다진 마늘 2큰술
재료 다진 생강 1작은술
재료 멸치액젓 또는 까나리액젓 1~2큰술
재료 국간장 또는 추가 액젓 약간(필요 시)
재료 설탕 또는 매실청 1~1.5큰술(선택)
재료 밀가루 또는 쌀가루 3큰술
재료 물 2.5~3컵(풀쑤기용)
재료 소금 1~1.5큰술(김치 국물 간 맞추기용)
재료 찬물 또는 식힌 풀물 2~3컵(김치 국물 농도 조절용)
2. 준비하기
재료 손질과 밑준비
- 열무는 시든 잎과 질긴 뿌리 끝을 다듬고 5~6cm 길이로 자릅니다. 흙이 많으면 찬물에 2~3번 살살 흔들어 씻어 건집니다.
- 무는 가늘게 채 썰거나 작은 막대 모양으로 썹니다. 오이를 넣을 경우에는 너무 두껍지 않게 썰어 가볍게 소금에 절여 물기를 빼둡니다.
- 실파는 5cm 길이로 자르고, 양파와 고추는 기호에 맞게 썰어 둡니다.
- 밀가루와 물을 섞어 풀을 쑤고 완전히 식힙니다. 뜨거운 상태로 넣으면 열무가 무르고 양념 맛이 탁해질 수 있습니다.
3. 만들기
조리하기
- 열무에 천일염을 골고루 뿌려 1~2시간 정도 절입니다. 줄기를 접었을 때 부드럽게 휘어지되, 완전히 흐물거리지 않을 정도가 알맞습니다.
- 절인 열무는 찬물에 2~3번 가볍게 헹군 뒤 체에 밭쳐 물기를 충분히 뺍니다. 세게 문지르면 풋내가 나거나 잎이 상할 수 있습니다.
- 큰 볼에 고춧가루, 다진 마늘, 다진 생강, 액젓, 설탕 또는 매실청을 넣고 식힌 풀물을 섞어 양념을 만듭니다. 필요하면 소금으로 간을 보완합니다.
- 열무와 무, 실파, 양파, 고추를 넣고 손으로 살살 버무립니다. 잎이 짓이겨지지 않도록 아래에서 위로 들어 올리듯 섞는 것이 좋습니다.
- 김치통에 눌러 담고, 재료가 너무 마르지 않도록 양념국물을 부어 줍니다. 윗부분이 완전히 잠기지 않더라도 전체가 촉촉하게 버무려지면 됩니다.
- 뚜껑을 덮고 실온에서 짧게 두어 발효를 시작한 뒤, 시원한 냄새와 약한 기포가 느껴지면 냉장 보관합니다. 바로 차게 식힌 뒤 먹어도 좋지만, 반나절에서 하루 정도 지나면 맛이 더 안정적입니다.
4. TIP
열무는 오래 절이면 아삭함이 줄고 짠맛이 강해지므로, 줄기 굵기에 맞춰 절임 시간을 조절하세요. 헹굴 때는 여러 번 세게 비비지 말고, 차가운 물에 살살 흔들어 소금을 빼야 풋내와 손상이 적습니다. 풀물은 양념이 잘 달라붙게 하고 국물맛을 부드럽게 해주지만, 너무 되직하면 텁텁해질 수 있으니 묽게 잡는 것이 좋습니다. 오이를 넣을 경우에는 수분이 많아 금방 물러질 수 있으니, 소량만 넣거나 따로 약하게 절여 사용하는 편이 안전합니다. 익는 속도는 실온 온도에 크게 좌우되므로, 더운 날에는 오래 두지 말고 냉장으로 빨리 옮기세요.
레시피 검토 메모
이 레시피는 열무김치의 표준적인 한국 가정 조리법을 바탕으로 새로 구성했습니다. 기존 글에 있던 오이 필수 사용, 과도하게 단정적인 상온 발효 안내는 일반적인 안전성과 완성도를 고려해 더 보수적으로 조정했습니다.
쇼핑몰K FOOD 추천상품
일부 링크는 제휴 마케팅 활동으로 수수료가 발생할 수 있습니다. 구매 전 원산지, 가격, 배송 정보를 상품 상세페이지에서 확인해 주세요.
자주 묻는 질문
- 열무김치는 왜 금방 익나요?
- 열무는 잎이 연하고 수분이 많아 배추김치보다 발효가 빨리 진행되는 편입니다. 그래서 짧게 실온에 두고 빠르게 냉장으로 옮기는 것이 좋습니다.
- 무를 꼭 넣어야 하나요?
- 아닙니다. 열무만으로도 담글 수 있습니다. 다만 무를 조금 넣으면 국물맛이 더 시원하고 식감도 풍성해집니다.
- 오이를 넣어도 되나요?
- 넣을 수는 있지만 필수는 아닙니다. 오이는 수분이 많아 금방 물러질 수 있으니 소량만 사용하거나 생략해도 됩니다.
- 국물이 너무 짜면 어떻게 하나요?
- 식힌 물이나 풀물을 조금씩 더 넣어 간을 맞추되, 한 번에 많이 넣지 말고 맛을 보면서 조절하세요.
- 언제 먹는 것이 가장 좋나요?
- 담근 직후의 풋풋한 맛도 좋고, 냉장 숙성 후 시원하고 살짝 익은 맛도 좋습니다. 취향에 따라 익힘 정도를 조절하면 됩니다.
Korean 열무김치 Recipe Summary
Yeolmu kimchi is a seasonal Korean kimchi made with young radish greens and often a little radish, seasoned with a light chili paste and fermented in a thin brine. Compared with napa cabbage kimchi, it is usually softer in body, more refreshing, and best when the greens stay crisp and the broth is clean and savory. The key is careful salting, gentle washing, and balanced seasoning so the kimchi ferments quickly without becoming watery or dull.


댓글목록
등록된 댓글이 없습니다.
 오곡밥
 오징어볶음
 골뱅이무침
 탕평채
 식혜
 오미자화채
 수정과
 유자차
 인삼차
 매실차
 녹차
 약과
 강정
 다식
 약식
 꿀떡
 송편
 경단
 백설기
 육회